If you have some free time and you know the difference between a screwdriver and a barn door, making your own silhouette targets is far easier than you think and the cost savings can help offset the high cost of ammunition.
The first thing you need is a supply of cardboard. The stuff is free for the taking mainly in commercial and light industrial areas. Auto body shops, bicycle and appliance stores use large boxes and are particularly good sources of raw materials. I would certainly ask first before raiding their dumpsters. The first illustration shows five pallets of cardboard boxes awaiting pickup by private sanitation, enough stock to make hundreds of targets.
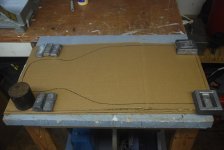
First, select a commercial target that you like. I used a target that I redesigned to add a bit more anatomical correctness. This will serve as a template. Next, cut a supply of cardboard rectangles a few inches larger than what the finished silhouette target will be. Draw an outline of your prototype silhouette target on one cardboard sheet. Using white or carpenters’ glue, stack the sheets together and tack-glue them at the corners, making sure the glue joints fall outside your cut line. You may also clamp or screw the cardstock together with coarse-thread drywall screws. Place weights over the glue while it sets up. Use this method to glue five sheets together.
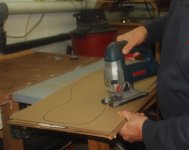
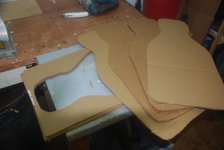
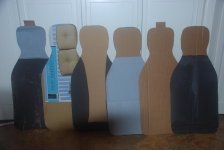
Next, using a saber saw, cut along the line you drew and you now have made five silhouette targets. You may have to adjust the number of targets you can gang cut, depending on your saw and the thickness of the cardboard. Gluing the sheets together eliminates the need to try and hold them in alignment while the saber saw does its thing. You may also use a band saw if you have one. If you shoot on an indoor range, you may leave a mounting tab at the top of the head to insert into the target clip (shown on two targets in the last illustration). In fact, you may modify your design to allow easy mounting depending on whatever target mounting system is in use at your range.
You may use the targets as is or paint them. Remember all that latex paint drying up in rusty cans in your garage, or those partially used Rustoleum cans and automotive primer? Your friends and neighbors may still have some leftovers in hideous psychedelic colors they’d be happy to part with. As the attire worn by your potential adversary can be infinite, you may even use the label side of the box as they bear a strong resemblance to printed T-shirts once cut into silhouette targets and viewed at distance. Use a small roller and paint the targets. The color isn’t important. In fact, using a variety of targets is a good training technique.
For sighting in, add an aiming point if needed. However, you should not use an aid or crutch in training that’s not available to you in a self-defense situation. For this reason, I don’t use aiming points as I don’t want to subconsciously condition myself to look for one on a living adversary. As I shoot on both public and police ranges, I do not write the names of, or sketch political figures on my targets. I don’t want to lend any credence to the myth that we’re all irresponsible gun nuts.
I generally assemble several stacks of cardboard to be gang cut. It takes about a minute per stack to cut out the targets. Besides a saw, the only other tools you need are a utility knife and a marker. This could also be a summer project in which you may enlist your children. Enjoy.


