Thanks Mike! My approach so far has been similar but far less systematic, which might explain why it hasn't worked so far . . .
2) Hammer moves freely, perhaps too freely: there's some side to side wobble and a visible gap.
2a) Hammer still moves freely, and adding the bolt reduces the wobble/gap.
3) Passes with aplomb.
4) Trigger moves freely. Some wobble, but less than the hammer has.
5) Hmmm that's interesting. The hand doesn't seem to want to move. I removed the hand and put the sideplate back on and the trigger moves smoothly. Next I removed the hammer block plunger from the sideplate and reinstalled it, and the trigger and hand moved smoothly. With the hammer block plunger back in the trigger/hand are sticky. I think we found a/the issue! I never would've discovered it on my own.
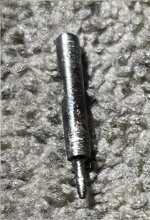
Now the next big question: how the heck do you clean/polish the smallest, least accessible hole on the gun?
 ...Ben


 ...Ben