You are using an out of date browser. It may not display this or other websites correctly.
You should upgrade or use an alternative browser.
You should upgrade or use an alternative browser.
How many of you guys have refinished a gun yourselves?
- Thread starter Model29-26.5
- Start date
I've posted this before:
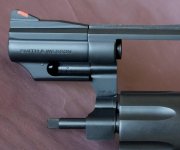
Duracoat option. This 39-2 was a disaster when acquired (free). Besides being disgusting dirty, pitted, most of the bluing worn, the person used JB weld to bond a strip of metal to frame to mount a flashlight.
I pried off the metal strip, used a Dremel to remove all the JB weld, totally disassembled, glass beaded major parts, cold blued the bits, and tru oiled the grips. Then sprayed with Duracoat and left it alone for 30 days.
The disassembly and assembly for this particular model was challenging to say the least, so many parts. In the end it now looks presentable and shoots perfectly. It was a fun project and saved this one from a horrible fate lol.


Exmilcop
Member
I refinished a pistol, years ago, with cold blue and got flamed for it. But I had a buddy who told me that heating the cleaned parts in the oven before applying the bluing compound would make a more durable finish and so it turned out to be. I hadn't planned on every refinishing another pistol but I picked up one fairly inexpensively (for Canada) because it was so bad! Only faint traces of nickel remained and it looked like someone had run a rag soaked in cold blue over the whole thing. The grips were badly fitted and the gaps filled with contact cement!!! I took all the old finish off which was a lot of work and time and very fiddly. Once I had it as polished as it was going to get, I sent it to a gunsmith who blued it for me. By doing the prep work the cost went from $600. to $70. Sadly, in the reassembly I broke the trigger return spring but thanks to some good friends, I'm awaiting parts that may resolve the issue. I'm attaching pics of what it looked like when I got it, disassembled, and partly reassembled. I will never do this again!
Attachments
stanmerrell
Member
I did a Colt Officers model once. It had an ugly oxide finish and I gave it a quick polish and sent it out for bluing. Turned out nicely. I had some experience, so was not a big deal. Things to consider:
Can you do all the disassembly and reassembly?
Do you have the patience?
Main thing is to keep the flats flat and the corners crisp. Avoid bluing any parts that are not supposed to be blued, like triggers and hammers. If you take it slow results will be good.
Can you do all the disassembly and reassembly?
Do you have the patience?
Main thing is to keep the flats flat and the corners crisp. Avoid bluing any parts that are not supposed to be blued, like triggers and hammers. If you take it slow results will be good.
I cold blued a single shot .22 bold like the one I grew up with. It turned out more grey than blue but made for a more presentable and serviceable finish than the pitted rust it had. The stock butt was cracked so I sawed it off and reshaped the butt pad. It left it appropriately sized for their age. I sanded the stock and used Brewax on it. My boys learned to shoot with it. One bullet and manually cocked for each shot. I know I killed a lot of rabbits with the one I had. Theykilled a ot of cans with theirs. It was definately not a restoration but good enough for out purposes.
- Joined
- Jun 28, 2007
- Messages
- 27,669
- Reaction score
- 21,356
Nice old pistol. Are you sure his girlfriend's name wasn't "Savage"? 
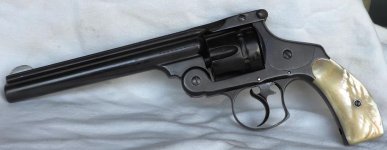
I have not refinished any per SE, but I did salvage one from a grisly fate. Bubba saw fit to 'enhance' the pistol with his girlfriend's name electro-penned into the metal of the upper. It was screwed up bad. After polishing out the 'art work', the last phase was a homegrown cold blue. I hit it 2 or 3 times and Burnished & buffed it out to nearly the same appearance of the rest of the gun. I don't think you can identify the repair now.
View attachment 699795
View attachment 699796
BillBro
Member
Im very tempted to rust blue my Ithaca M37, very very tempted
03hemi
Member
- Joined
- Jan 27, 2014
- Messages
- 3,553
- Reaction score
- 6,979
I've done three so far where I've completely tore them down to bare frame and rebuilt and re-did or enhanced the worn finish.How did it go?
I'm working my way up to doing it when I find the right beater for the right price.
I'd take it to be blued elsewhere but I'd want to do the prep.
Any advice, stories or before/after photos of home refin revolvers?
Essential tools or polishing equipment/conpounds? Substances?
Thanks
These were all upgraded inside and out, they turned out great.
Gotta break em all the way down though, if you can't completely disassemble the gun, don't start.
Before

After

No before picture, but plain dull matt satin finish

Before

After

Last edited:
I've refinished, and built a number of guns. Mostly rifles, and those were mostly 1800's rifles. Sometimes started with dogs, and other times started with just a good action and nothing else.
I don't have the ability to do barrel fitting, so I took or sent them to a gunsmith to have barrels threaded and chambered. But I do all the stock builds, or stock restoration, and I rust blue barrels. Most I've done I sent actions I polished out to Al Springer for color casehardening as I love the look on old rifles. The cost of having the casehardening done and barrels fitted has been reasonable, and it's allowed me to end up with rifles worth more than I had invested by doing everything else.
This was my last build, a replica of the Remington Creedmoor long range rifle. Built up from an old military Rolling Block action I got from a buddy for $80. Added a pistol grip lower tang, Green Mountain 34" barrel, and new wood.


This is another I built from just an action about 20 years ago.

I don't have the ability to do barrel fitting, so I took or sent them to a gunsmith to have barrels threaded and chambered. But I do all the stock builds, or stock restoration, and I rust blue barrels. Most I've done I sent actions I polished out to Al Springer for color casehardening as I love the look on old rifles. The cost of having the casehardening done and barrels fitted has been reasonable, and it's allowed me to end up with rifles worth more than I had invested by doing everything else.
This was my last build, a replica of the Remington Creedmoor long range rifle. Built up from an old military Rolling Block action I got from a buddy for $80. Added a pistol grip lower tang, Green Mountain 34" barrel, and new wood.


This is another I built from just an action about 20 years ago.

Similar threads
- Replies
- 52
- Views
- 3K
- Replies
- 22
- Views
- 2K
- Replies
- 19
- Views
- 1K
- Replies
- 20
- Views
- 1K


![DSCN3571[1].jpg](https://cdn.smith-wessonforum.com/attachments/582/582411-c78354d4da05c3ccbeeabc774d57a11d.jpg?hash=MwWutvMMG3)

