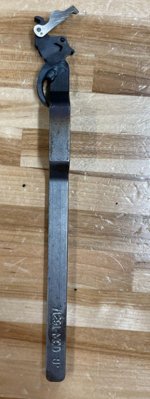
What part to file hand/ratchet fitting

Here is the page from the S&W Armorer's manual on filing the ratchets.

Stu
attachment.php
 

Attachments

  • file ratchets[2].jpg
    file ratchets[2].jpg
    46.8 KB · Views: 373
I can see where a the right size Barret file would beat out a small flat file. I have quite a few small knife edge files which would also work if safed on back side.

But I am seriously thinking about making the tool posted by toyman in the other thread. 686+ Ratchet Teeth

I have some of extra triggers and hands. It looks like the pivot pin maybe oversized. But, I would think that if f the hand pivot is smaller than the trigger stud, the hand pivot should break before the stud. On a new gun or replacement cylinder I have felt the hand scrape by on a tight tooth and after a few passes it is fine.

I have a whole dresser drawer full of homemade revolver tools anyway
 

Attachments

  • 7s3ZXo9.jpg
    7s3ZXo9.jpg
    44.6 KB · Views: 93
Last edited:
Another thought on "action jobs".

I have changed barrels, cylinders, reamed cylinders, fit cylinders, changed springs. Cleaned up high spots on the bosses and where rebound slide moves, adjusted end shake and installed trigger and hammer shims, replaced hands and stops and adjusted the DA sear or fly. I know how to stone the SA sear if it has push off

I have never found the need to mess with the sear surfaces on a trigger or hammer to get a smoother trigger pull

\Did it, but I have no ratchets that need cut at this time. LOL

8YF1kuZ.jpg
 
Last edited:
Steelslaver, moss doesn't grow under your feet; that was fast.
That's pretty cool that you fabricated this after looking at the pictures of one. I'd love to see it in use....hint, hint.
 
It is now in the mail to another forum member.

In actuality it is just a real long trigger that increases your leverage. K,L and N frames all use the same trigger. The jogs in the lever are so that the extension added to the trigger clears the trigger guard.

I took a spare trigger I had removed the rebound slide toggle and welded on an extension similar to the on in the one toyman showed in another thread. the hand spring is still in the trigger and you must install the correct hand for your frame size. Then install in a frame. Need the cylinder stop and bolt to lock up cylinder, but do not need hammer or rebound slide and spring. Side plate needs to be on to fully support the trigger stud. Pulling back on lever is just like pulling the trigger, it trips cylinder stop and cylinder turns into position and the stop locks it up same as always. IF the ratchet tooth is long instead of the hand slipping by the tooth, the top chisel like edge on top of the hand will be caught against the high part of tooth. The hand is very hard and the ratchet is soft. Then the added leverage gives you enough mechanical advantage that the edge of the soft ratchet is peeled of by the top of the hard hand. Very similar to a hard cold chisel being drove against a small corner of soft steel. As the hands pivot pin is smaller than the trigger stud and only supported in one spot on the hand it should break well before the larger OD trigger stud which is supported by the frame and the side plate.

Ideally one could have several thickness hands for each frame size. Use the tool with thinnest hand until tool runs smooth, meaning it has shaved all the teeth as much as it is going to, then try your trigger and hand. If it goes your done. If not install thicker hand in tool and run it again.

I have had new guns or replaced a cylinder and found a hitch in the trigger right after the gun cylinder locks up, but before the hammer falls. The hand is against a slightly high ratchet tooth. If you simply dry fire it repeatedly, the hand will do just what the tool does and shave a tiny bit off any slightly tight teeth. That or a few passes with a fine diamond file and no more hitch. Occasionally you will find small burs on top of new ratchet teeth. The hand rubbing the side of tooth did it. A swipe or 2 on top of those teeth with a stone or fine diamond file cleans them right off. The ratchet teeth should and can be slightly lower than the center button around the tip of the center pin. That center button is what holds the cylinder's pressed back headspace. That is not the top of the ratchet teeth job. The fit between end of yoke tube and bottom of center pivot hole in cylinder is what holds pressed forward head space. The barrel is fit to the cylinder, not the cylinder to the barrel to get proper B?C gap

Revolvers are so interesting. Simple parts doing precision operations. All with just enough clearances to operate smoothly.

The trigger does 4 things when you begin pulling it back. It pulls the stop down as the hand begins to turn the cylinder, and also presses on the DA fly to start to rotate the hammer back. It also slides back the rebound slide. The front tip of the trigger releases the stop very quickly so it's tooth can pop up ready to ride into the lead in to its stop notch. The stop has a oval hole so it can slide out of the way enough to clear that tip when trigger is released. The DA sear clears the trigger and the trigger is begins to directly rolling the hammer back to near the end of it sear. As the trigger keeps moving the hand pushes the ratchet and revolves the cylinder to the point the stop pops into its notch and then the hand slides by edge the tooth and then the trigger releases the hammer to rotate forward and strike the hammer. Boom, the bullet leaves the case and jumps into the forcing cone and as it bridges that gap that the tiny bit of slack in the stop to stop notch fit allows cylinder and bore to become even more closely aligned as the base of the bullet is still in the throat as the body of the bullet begins to engage the rifling. Accuracy!

The amount of simple genius in the design is amazing. Toggles, springs, levers, axles and pins all working together.

The only real changes in how the action itself operates from S&W's very first double action top break revolvers to the current ones is modifications to how the springs operate the trigger, hammer, DA fly and hand. I simply can not imagine the absolute need for machining ability needed to make them 150 years ago. Rivaled only by watch makers IMHO
 
Last edited:
As usual, the Man himself (steelslaver), comes through once again with the most accurate, detailed and experienced information !!!

We are lucky to have Guys like him, as well as so many others aboard this forum !

I am a new member and I am so impressed with all the Great Guys here that are so willing to help !!!!

Thanks to all,
John
 
FYI all,
eBay has a couple of copies left of the, Smith & Wesson Armorer Repair Manual - Revolvers - Brand NEW!! that may be of interest.
It has a note of 1984? so it my not the most current revolvers but it has a lot of good info for the folks interested in the internals.
 
Yes, it and Kuhnhausen's S&W book are loaded with information

I do content that the very best thing one can do is buy and old beater model 10 and then start collecting and changing parts on it. Put in another cylinder. Install another hammer, trigger, hand, cylinder stop. yoke. Get brave and take off the barrel and replace it or another shorter or longer one. Mess with the springs and the main spring screw length.

If you take 2 hardwood board and inlet them a bit and then clamp them on the frame with a decent C clamp and then stick the barrel in a vise padded with 2 more pieces of hardwood you can get the barrel off without damaging the frame. The torque just isn't that high. Look at the tool the factory uses in the pro department at about the 4 minute mark. Just a large padded fork that they use to turn it the last 90 degrees.
[ame]https://www.youtube.com/watch?v=PQ3HDLkB5l8[/ame]

I made a frame wrench and use it. But the barrels, pinned or non pinned are just not all that tight
 
Last edited:
I agree with Steelslaver, a great way to learn is by changing parts and working on your own things. It's the same whether we're talking about guns, cars, appliances, etc.

The first time I changed a barrel (with a best friend's help), I was surprised at how little torque was needed to loosen it and here's the bigger lesson:
I learned that the M64 (.38 Spl) cylinder is slightly shorter than the M65 (magnum). I assumed that the magnum cylinder was the the same OAL but just bored out to a longer length.
This M64-5 now wears a 3" M65 barrel. I then had to source a .357 cylinder but now it shoots both 38 spl and .357.

It's a NY-1 gun, so I'm casually looking for a 3" .38 barrel to return it to its original caliber.
 

Attachments

  • M64 3 inch barrel converted to magnum.jpg
    M64 3 inch barrel converted to magnum.jpg
    9 KB · Views: 5
Last edited:
I bought this model 10-2 about 20 years ago at a gun show with a cracked forcing cone. I found a cheap Parker Hale barrel and replace the barrel. I round butted it. Then I reamed it to 357 mag. Then I found a recessed model 19 cylinder and installed it. The I found a 2 1/2" model 19 barrel on on it went. By then I had a mill so on went adjustable sights. One day I will reprofile the top rib to match the frame and leave a narrow ramp for the front sight.

But, for now it is a serviceable K frame 357 mag that I have at most $350 in. I learned so much form thios gun. The spring board to my pinned and recessed 45 colts, my K frame 327 mags, my Smolts, my revolving carbines all started from what I learned with this 10-2

fIDM0p7.jpg
 
Alright folks an update.
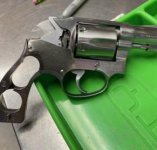
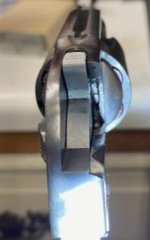
I used a new basic smith and wesson revolver arm and a new extractor. I think the arm was perhaps for a different model because the pin that goes through the trigger was too long but I filed it down to fit.
I got everything working. Ill be honest, I don't care about the weight of the trigger I care about its consistency.
Before the trigger has gotten to be atrocious and inconsistent with timing issues for half the chambers.
Now I hear two beautiful clicks, cylinder stop dropping and cylinder stop engaging early in the trigger pull so I can always stage my DA trigger pull(I only shoot DA).
Trigger is very consistent. There are two chambers that are 0.5 pounds heavier and there is a little bit of resistance but I can touch up those ratchets a little bit to bring it inline.


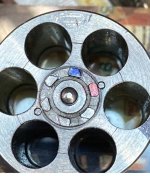
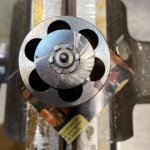
I did not use a barret file I used india stones the red one and the white one for final polish. I initially filed the arm just a little bit so the hand would barley slip over the most "loose" ratchet I had. This was lengthy process but necessary. Once I did that one I marked the next ratchet and started filing a little bit at the time until the hand was able to advance it. There is a very small space between having a hard trigger and it needing to be filed for a good smooth trigger pull and "oops you screwed up the timing". I did this 7 times after the initial fitting to the "loosest" ratchet.

It is good to have my consistent double action trigger pull back. There are two chambers that the final pull feels just a tiny bit notchy as I mentioned above, I will polish those two ratchets to bring the trigger pull in line.
I am so happy to have my 627 back. I have tens of thousands of rounds through it and probably over 100k of dry fire trigger pulls.
 
Back
Top