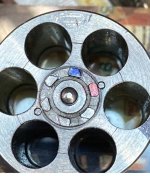
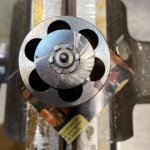
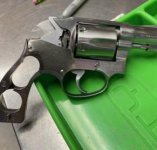
Hey folks I have a 627 that had too many fast and hard DA rounds and dry fire through it. The extractor ratchet surfaces are messed up.
I got new extractor and new hand. No I am not sending it to the factory, this is my hobby and I enjoy learning.
Obviously with new hand and extractor when I pull the trigger revolver binds up looks like the hand doesnt want to slip past the bend of the ratchet.
I am supposed to file the ratchet and not the hand correct?
Which part of the ratchet do I file? The one closer to the inside against which the "push" starts or the outside part against which the hand comes to rest?
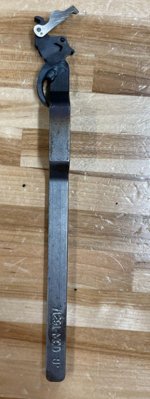
Edit: terrible drawing representing a ratchet.
I got new extractor and new hand. No I am not sending it to the factory, this is my hobby and I enjoy learning.
Obviously with new hand and extractor when I pull the trigger revolver binds up looks like the hand doesnt want to slip past the bend of the ratchet.
I am supposed to file the ratchet and not the hand correct?
Which part of the ratchet do I file? The one closer to the inside against which the "push" starts or the outside part against which the hand comes to rest?
Edit: terrible drawing representing a ratchet.
Attachments

Last edited:


![file ratchets[2].jpg](https://cdn.smith-wessonforum.com/attachments/532/532099-b54380c927ff9847310a5ac40055d8fd.jpg?hash=shJd84RShc)